


 Express version: Updates enhance the performance, functionality and security of your WordPress site. I recommend doing them manually (by switching off BlueHost’s auto updates function) and setting a calendar reminder to do this once per month. Thankfully, it’s pretty simple (just make sure you backup your site first).
The lesson: If you have a smartphone with apps, you’re probably already aware that software updates happen, and sometimes frequently. Well, WordPress is no different – it requires updating, and the good news is it’s relatively simple to do!
Reasons for updates
They’re not just for fun! Here are three reasons to perform them:
1. For improved functionality and or/performance
2. To fix bugs with the existing software
3. To fix security issues.
What to update
To clarify, there are three things that require updating:
1. WordPress itself
2. WordPress themes
3. WordPress plugins
BlueHost automtic updates
Within the cPanel for BlueHost there is an area where you can switch on or off automatic WordPress updates. As I mentioned in an earlier lesson, I RECOMMEND YOU TURN THIS OFF. When these type of things update themselves and things go wrong – as they occasionally do – it’s much harder to work out what the problem is because the chances are that a number of things could have been updated at once. I distinctly remember viewing my site not long after BlueHost introduced this feature and discovering my theme had broken. I had no idea what had happened because I wasn’t aware that it had been automatically updated. It took me days to sort out where and why the problem had occurred. Had I done the update myself and the site had broken, I would have known instantly that the problem was to do with the theme and I could have resolved it quickly.
So while automatic updates might sound like a time-saver at first, they may cause headaches in the future. Save yourself the hassle and learn how to backup and update yourself.
Updating precautions
I’ll cover the step-by-step instructions in a moment, but before you attempt an update, take note of these three very important (but friendly!) warnings!
1. Always backup your site first. Always, always, always. If you’ve read the lesson on backing up, you’ll know that if something’s going to go wrong with your site, this is one of the times it’s likely to happen.
2. Once an update is ready, wait a few days. While updates are strongly recommended for security purposes, I actually recommend waiting. This might sound counterproductive, but I often find that once a developer releases an update, they release another one (or two or three) shortly after as bugs are found and fixed. Waiting a short period reduces the number of updates and leave less room for potential headaches! The exception to this is when a major security flaw has been found, in which case, update ASAP!
3. Perform plugin updates one at a time. While it may be tempting to update 10 plugins at once, don’t. If one of the updates causes a problem (such as your site breaking) it’s easier to rectify when you know which plugin is problematic, rather than working through each, one-by-one. You only need to update a bunch of plugins once – and have a problem – for you to be certain that you’ll never, ever do that again!
Pro tip: Though it’s not 100% necessary, I like to test all updates on a duplicate version of my site (created using Backup Buddy) before I update them here (I mentioned this back in the lesson on hosting). Usually, things work OK, but from time-to-time, it has been helpful to pick up on problems before they happen to my main site. I haven’t covered the how-tos of this yet (as it’s not really beginner), but if you’re interested, let me know in the comments!
When to update WordPress
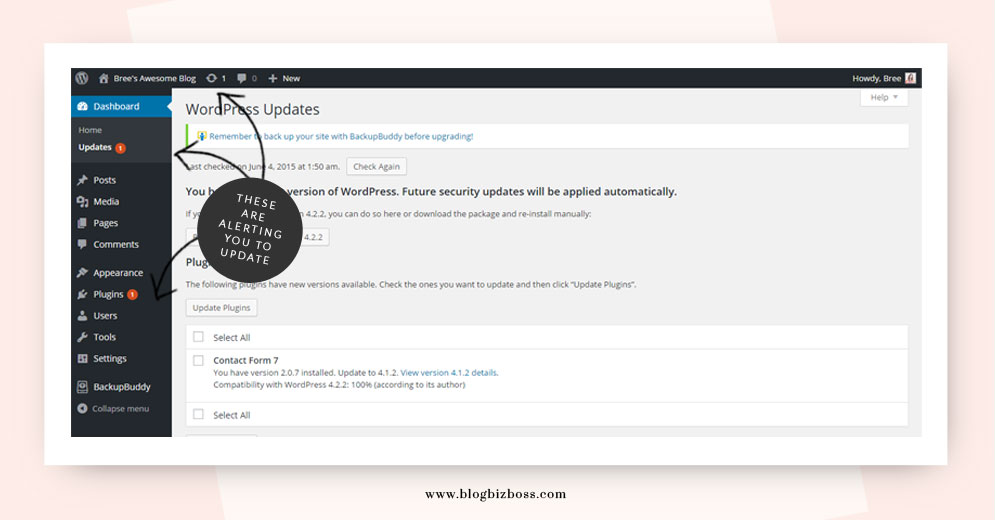
You’ll know if updates are required because you’ll get notifications in your WordPress dashboard. They’re in the form of an icon in the menu bar, a number in a red circle (as indicated in the image below) or a notification bar (not pictured). If you’re using a premium theme or plugin, you may also get an e-mail from the developers (especially if the update is a major one, or is for security purposes).
How to update
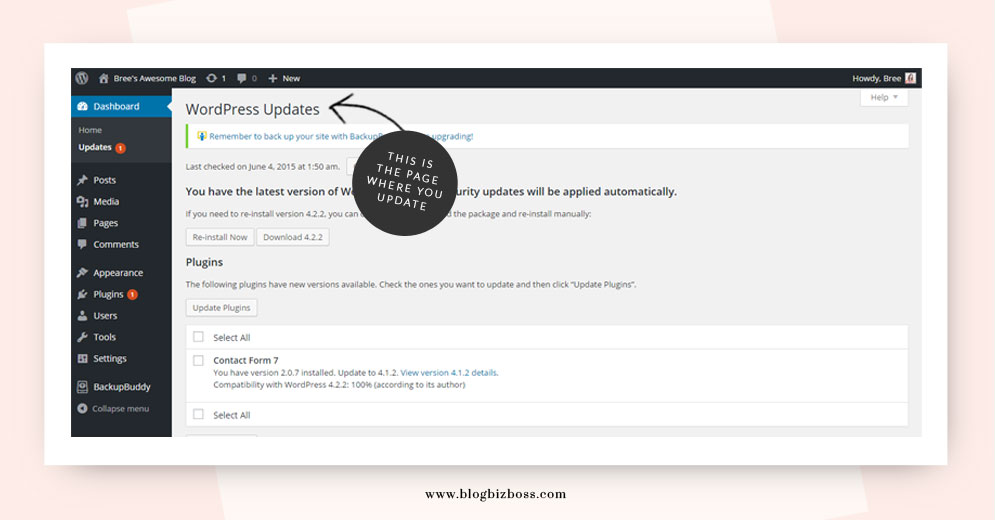
On the Updates page, you’ll see everything that needs updating at this point in time. In the below example, it’s a free plugin (Contact Form 7). Theme or plugin, free or premium, it doesn’t matter – things that need updating will appear here.
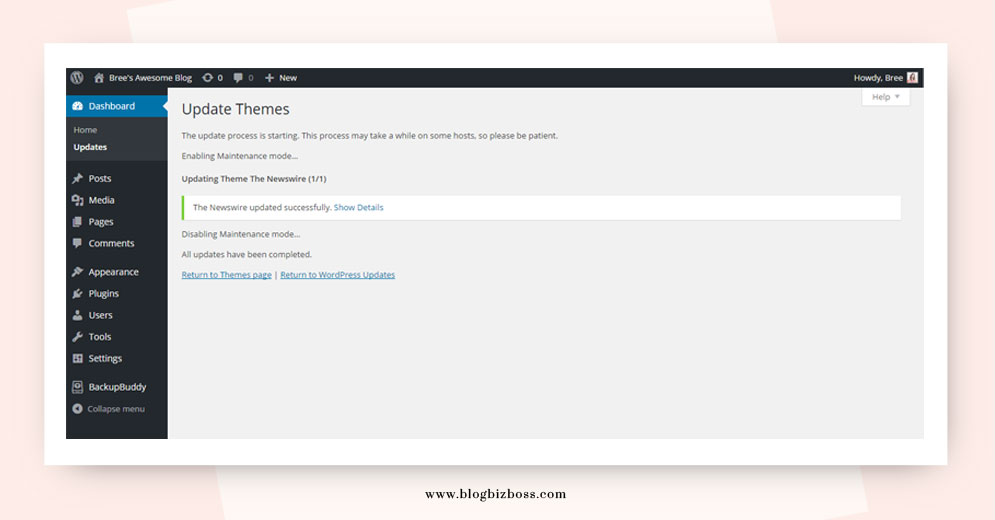
To update themes or plugins, tick the check box and then select Update Themes or Update Plugins. Again… do this one at a time! Updates are generally very brief – a matter of seconds – and your visitors won’t be able to see your site during this time. Once the update is complete, you’ll get a notification, as seen below.
Keep repeating this step one-by-one (hopefully I’ve made that clear!) until each thing that needs updating is complete. Now, that wasn’t too painful, was it?!
Special update circumstances
Occasionally developers may change their plugins or themes in such a way that an automatic update isn’t an option. This is rare (although, I have to do this with my Bluchic theme!), but my require you to do the update via FTP. If that’s the case, you need to download the updated .zip folder, unzip it and, in your FTP navigate to wp-content/uploads/plugins or wp-content/uploads/themes. Here, you delete the entire plugin or theme folder and replace it with the new one (by dragging the folder from the left screen to the right). Again, this is not a normal occurrence, and the developer will likely provide you with step-by-step instructions if it’s required.
If you’re required to do this just for a theme, then I recommend you skip the FTP part and use the Reinstall Themes plugin. This means you install and activate the plugin first, then you go to the themes page and install your existing theme again. The plugin basically allows you to install the updated version of your theme over the top of your older version of the theme.
Related video
In this YouTube video by user LevelUpTuts you’ll see how to update WordPress.
Do you have any questions on making updates? Ask in the comments below!
Next lesson: How to improve WordPress security and performance

Uh oh, I ran four updates the other night and my home page, share buttons and comments are all missing now. I have a premium theme and contacted the developer, but he doesn’t think his theme update did it.
Now, who should I call?
I did a back up first and ran each update one by one, but I guess I should have gone back to my site each time and looked around.
@sarah It’s usually OK! You just need to find out which plugin is the culprit. Check out my post on What to do if something goes wrong (if you haven’t already). It covers how to deactivate and re-activate one-by-one to see if you can detect which plugin is causing an issue (if any). Usually if a plugin causes a problem the plugin developer works it out pretty soon and updates it again. If not, you could try replacing it with something similar!