


 Express version: The most import thing to know about installing WordPress themes is that you need a little patience! Not because it’s hard, but because all themes differ, and some may have many settings to work on before your chosen theme displays as it should. But if you’re short on time, you could always try Fiverr, where you can find an experienced WordPress user to install it and set it up for as little as $5USD (usually within 24 hours!). In the next lesson, I’ll show you how to customise it.
The lesson: As I’ve mentioned previously, themes are like your blog or website’s outfit – they’re what changes the look and feel of WordPress. You could describe a theme as the “design”, but there’s more to it than just colours and fonts. Depending on which theme you choose, the theme may control some functionality too.
Finding the perfect theme for you
I could write a post a mile long on your options for creating the perfect look for your WordPress site, but since this is a beginner e-course, here are the essentials!
What to look for when choosing a theme
- A layout that’s close to what you want. This is more important than finding a theme with the perfect colours, fonts or demo pictures (which can easily be changed).
- Readily available support from the developer if you need it. Check the developer’s social media accounts to see if they’re active, and what other people are saying.
- Responsiveness. Google now favours responsive sites in their search engines (this means that their appearance changes to suit the size of the device they’re being viewed on). Most modern themes are responsive, and are usually labelled as such, but if you’re not sure, simply shoot the designer an e-mail or preview it on a website such as deviceponsive.
Where to find quality themes
Basically, you have a two choices of ready-made themes: free and premium.
Free themes
Free themes are great… because they’re free! If you browse the wordpress.org website, you’ll see that they literally have thousands of free themes available. And if you choose to use a free theme, this is the only place I recommend you get it from. For security reasons, don’t simply download a pretty free theme you found via Google – regardless of how nice it looks – as it may contain malicious code. That’s not to say a theme you pay for is guaranteed safe, but it’s probably much less likely that someone selling premium themes is going to risk damaging their reputation by creating shonky products!
Premium themes
I’d say the biggest advantages of premium themes (or paid themes) is that they tend to look nicer, come with support if you need it, and more frequent security and performance updates. Sure, a free theme might offer those things too, but without payment, there may be less incentive for the developer to respond to your questions for help should you need them. There are many places you can find premium themes – I suggest starting with my gallery right here! I have included themes from designers such as BluChic, Station Seven, 17th Avenue, Angie Makes, Pretty Darn Cute Design, and Restored 316. They’re all really beautiful and popular themes for blogs, websites, and stores.
There are also other options you may come across, such as frameworks, things called child themes, skins and templates. To install these, there are additional steps (it’s usually a two-part process), so just be aware that if you choose something other than a standard theme (such as those from the wordpress.org library), the instructions below won’t quite cover what you need to know (they cover the first part, but not the second). However, installing a child theme is pretty simple and the designers who make and sell them will always include instructions for this easy and additional step. Make sure you read them!
Side note: If you’ve chosen a theme that’s particularly complex to set up, there’s a cheap ‘n’ cheerful option if you’re having any problems… and it’s called Fiverr. It’s an outsourcing website and has many users available who will set up your WordPress theme exactly as the demo appears for as low as $5USD! Setting up a new theme is probably the most time-consuming step of the whole WordPress process. Not because it’s hard, per se, but because it can involve numerous adjustments and settings which can sometimes be tricky to find. Seriously, don’t stress if you can’t work it out straightaway, but just know there is the option for budget-friendly help if you need it!
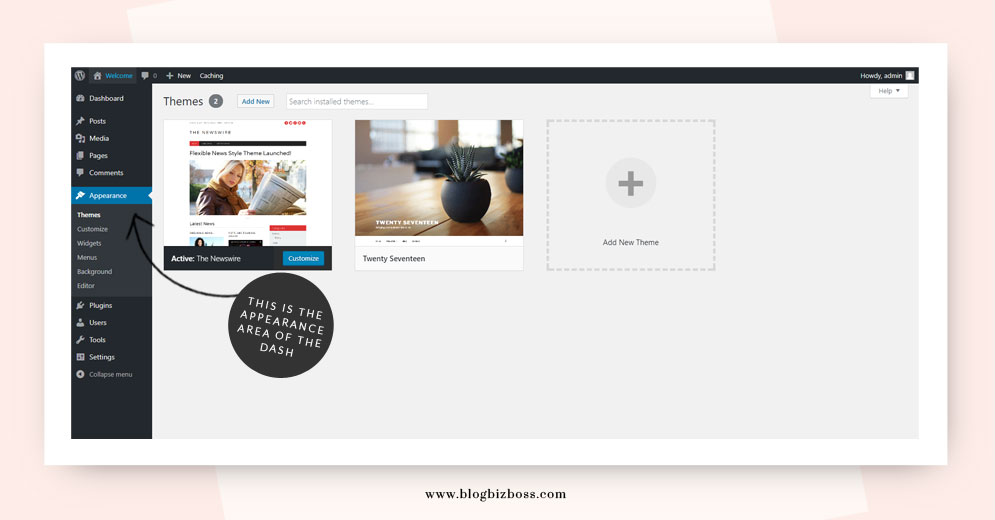
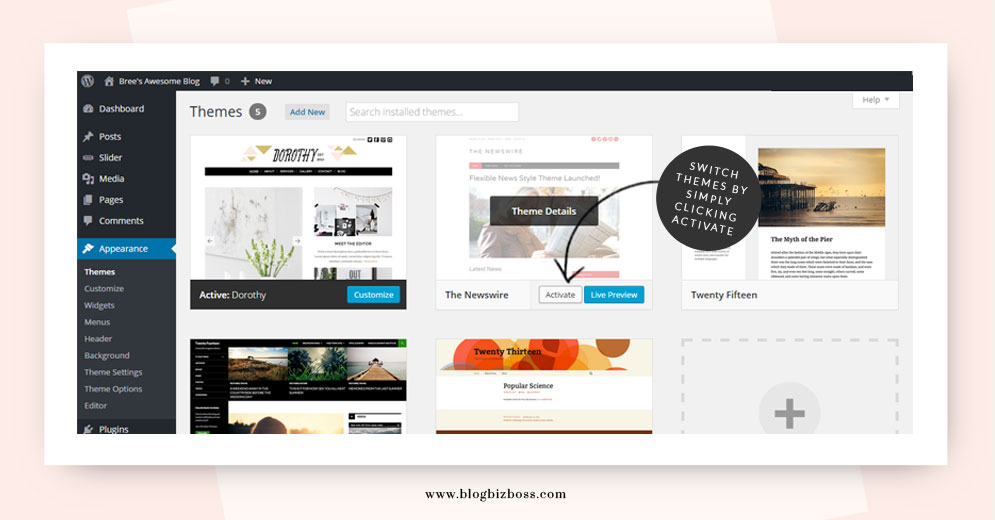
The themes page
Head to the WordPress dashboard and clicking on Appearance > Themes. This is the area where you not only add new themes, but activate or preview them.
How to install a WordPress theme
You’ve probably noticed a pattern by now… there are usually two ways to do many things when it comes to WordPress! Installing a theme is no different… you can install a free theme by searching for it directly in the dashboard, or you can download and install a .zip file. Let’s cover both ways!
(Side note: There’s actually a third way, but this is getting a little beyond beginner stuff! You can also download a theme, unzip it, and upload it via FTP – which you now know all about! – to the wp-content/themes folder. Then you head back to your WordPress dashboard and head to Appearance > Themes. Find the theme you’ve just uploaded and click activate. You probably won’t ever need to do this, but it’s good to be aware of, just in case!)
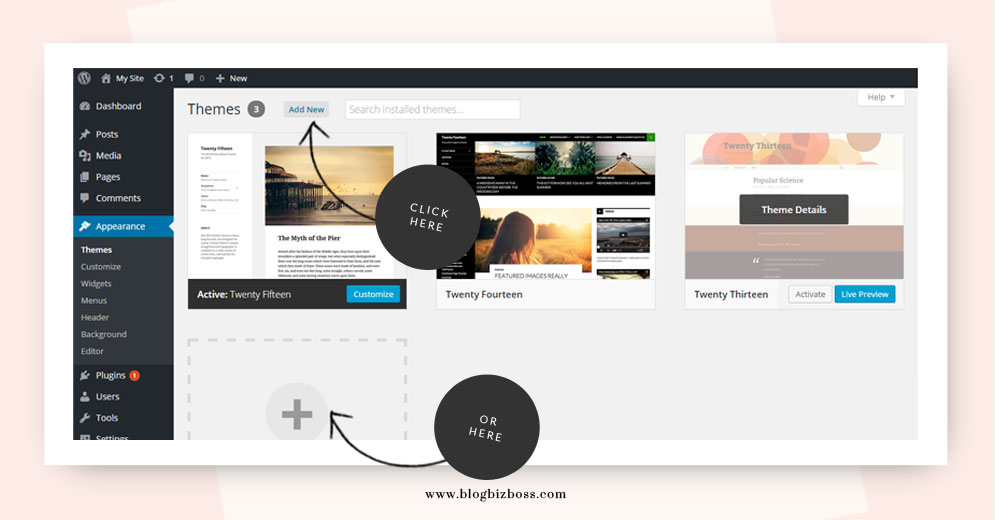
Option 1: searching and installing
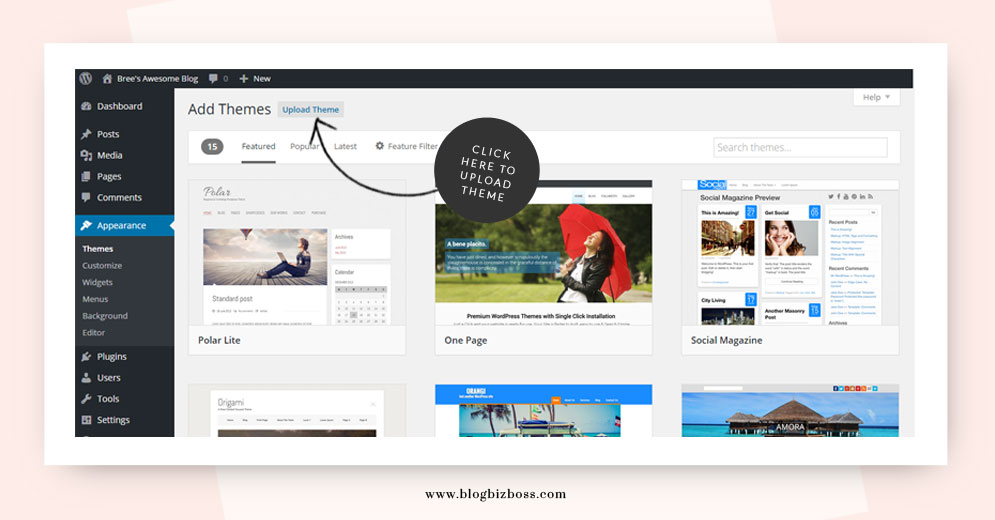
This is how you’d install a free theme directly from the wordpress.org website’s library. On the Themes page, start by either clicking the big plus sign or add new.
On the next page, you can use the filters or the search bar to find a theme that suits your needs.
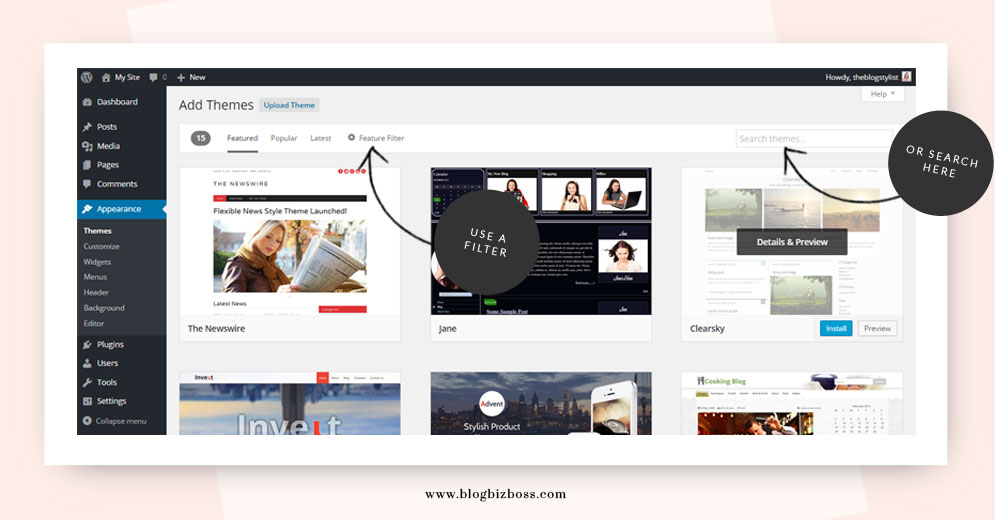
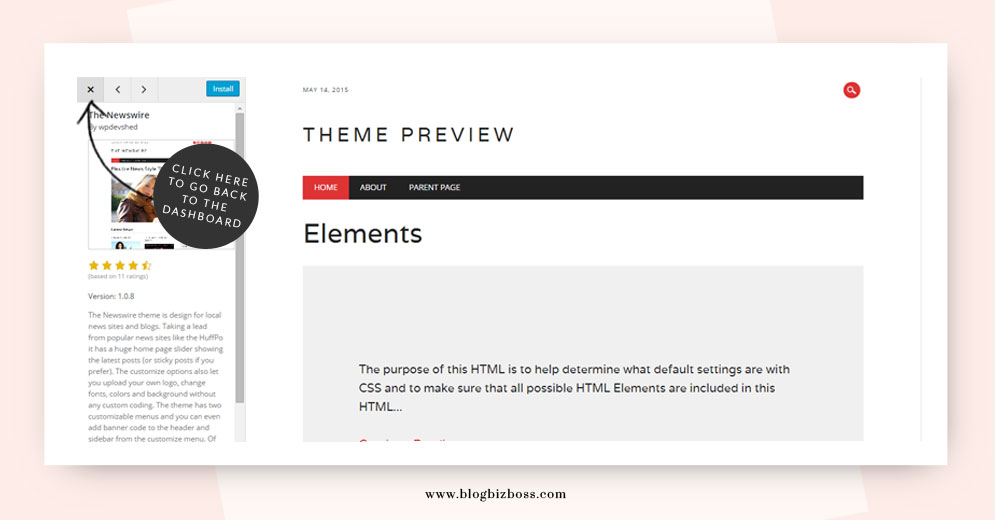
Each theme you click on will give you the opportunity to preview how it looks, as well as read its description and user reviews. A tip: the preview may not look exactly as the thumbnail. This is simply because there may be some settings you need to adjust after installing it in order for it to look as pictured. In this picture below, I’m using The Newswire theme by WP Dev Shed.
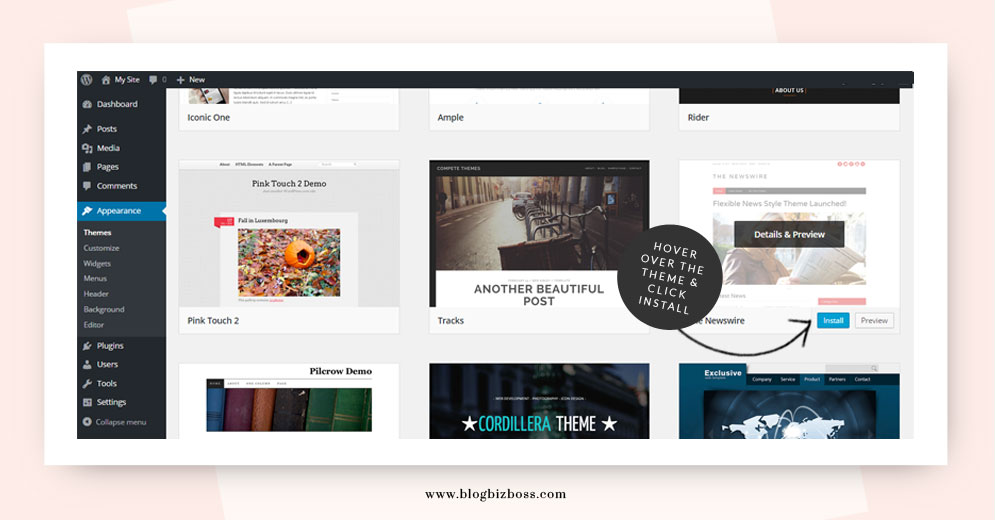
To install your chosen theme, simply hover over it and click the install button.
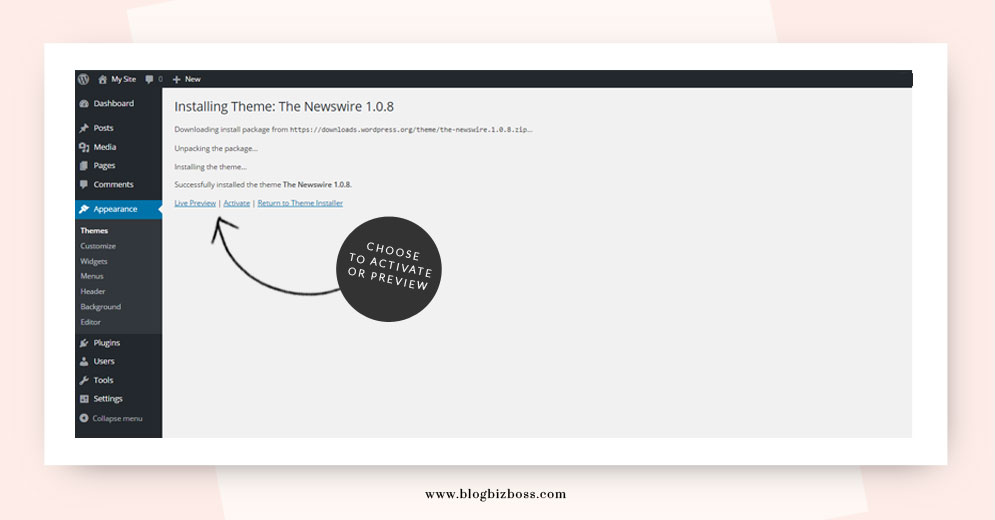
Now you get to choose if you want to preview it or activate it. If you preview it this time, it will look different because it’s actually installed and will include the content that’s on your site (that is, you’re no longer looking at a demo site). This option is helpful if you already have a theme installed and would like to see how it looks before implementing it for your viewers to see. However, since this is a brand new site, we don’t have any content yet. You can still hit preview, but it’ll look pretty bland and empty. To activate it, simply click activate. You can now check it out on the front end of your site (but remember, without content you can’t expect it to look perfect at this stage!).
Option 2: downloading and installing
This is how you’d install a premium theme that you’ve purchased and downloaded as a .zip file. Start by heading to Appearance > Themes and clicking add new or the big plus sign – just like we covered above. The difference this time, is that when you move to the next screen, we’re going to select Upload Theme.
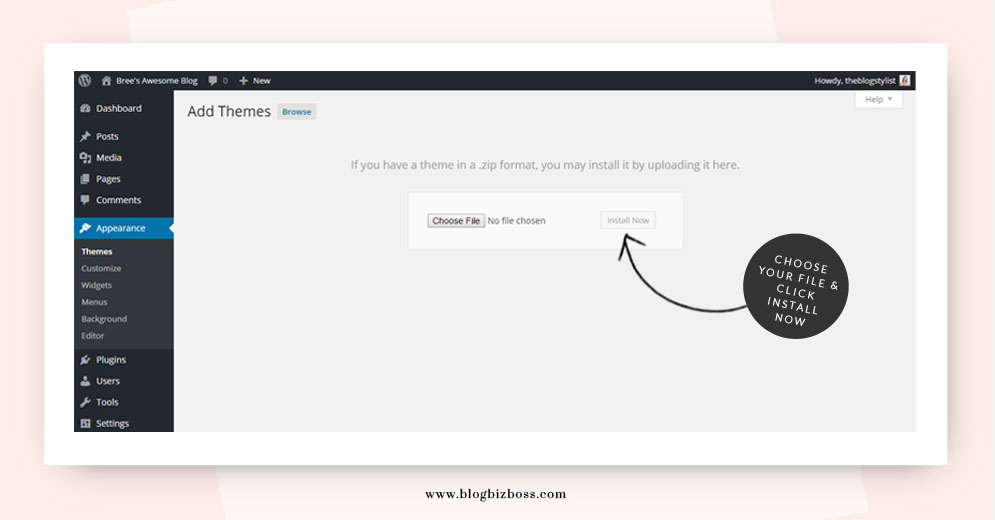
On the next screen, you’ll be prompted to upload your theme as a .zip file. For this demonstration, I’m using the premium BluChic theme called Dorothy. BluChic themes have been super popular for my readers! Once you’ve purchased and downloaded it to your computer, you can upload it to WordPress (as pictured below). But, before you do that, make sure that the .zip file you’ve downloaded doesn’t have another .zip file within it (along with other files, such as instructions or Photoshop templates). If you upload the wrong .zip file, things won’t work as they should. If there’s more than one .zip file, you want the one inside the one you downloaded.
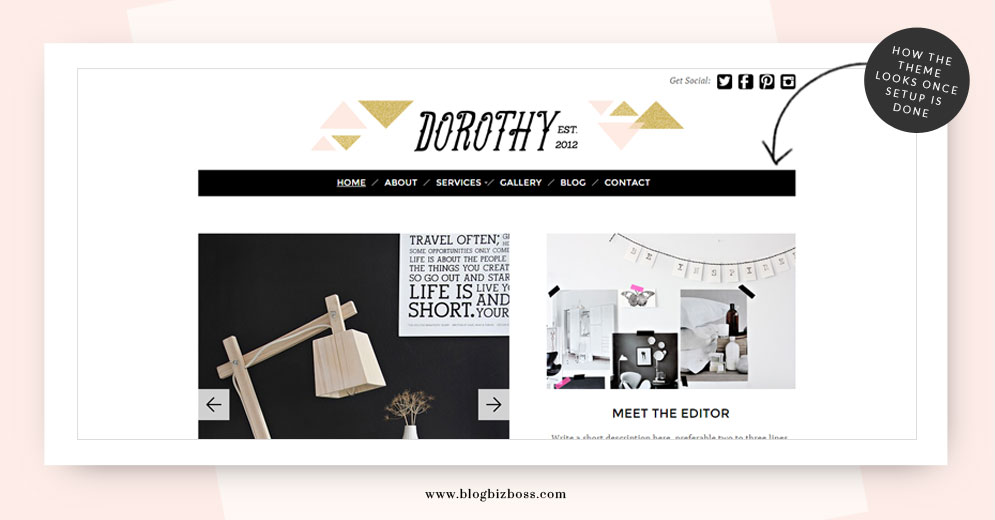
Once it’s installed, you just need to click the activate link (as mentioned in a previous step). Again, remember that things on the front end might not look like they’re supposed to just yet – you’ll need to do some setting up of the theme in order for it to look as you want it to!
Now’s a very good time to READ THROUGH ANY INSTRUCTIONS PROVIDED BY THE DESIGNER. Seriously! Some themes will work straight out of the box, some themes will need some settings adjusted (such as social media profile links), and some themes may even need a plugin installed or certain templates applied to some pages. You’ll also need to set up menus and widgets, but we’ll be covering that soon!
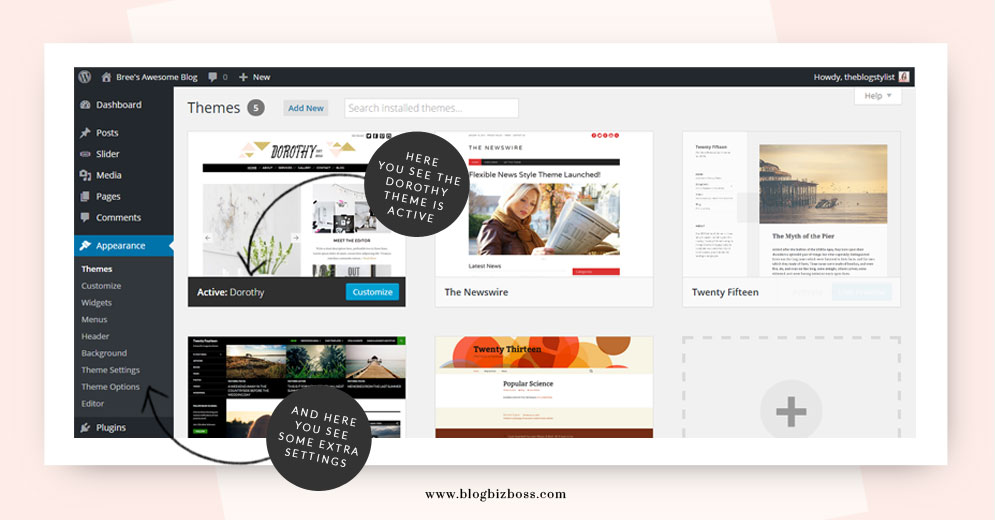
The BluChic theme I’ve chosen does need some basic setting up (and they do a really good job at providing the instructions on their site). In the picture below, you’ll see that now that it’s installed there are some extra options in the Appearance area of the menu. These include theme settings and theme options. There is also slider (which controls the home page slider) positioned in the menu bar, just below posts.
Adjusting theme settings
What theme settings or theme options you need to adjust will vary based on the theme. In this BluChic example, you’re given the opportunity of how you’d like the slider on the home page to transition. Again, you’ll need to take the time to read over the instructions provided by the theme’s maker. You may actually want to leave the theme setting up for now, and continue on with the course so you know how to use menus, widgets and more – this knowledge will make the setting up of your theme even easier!
How to switch a WordPress theme
Sometimes, you might install and activate a theme and realise it’s not what you want. That’s OK! You can simply install and activate another theme, or you can activate a theme that’s already installed. It’s really easy to do this – head to the Themes page in the dashboard, hover over a theme that’s not installed and click Activate. Just keep in mind that you might need to go through some of the set-up process again, especially when it comes to menus and widgets.
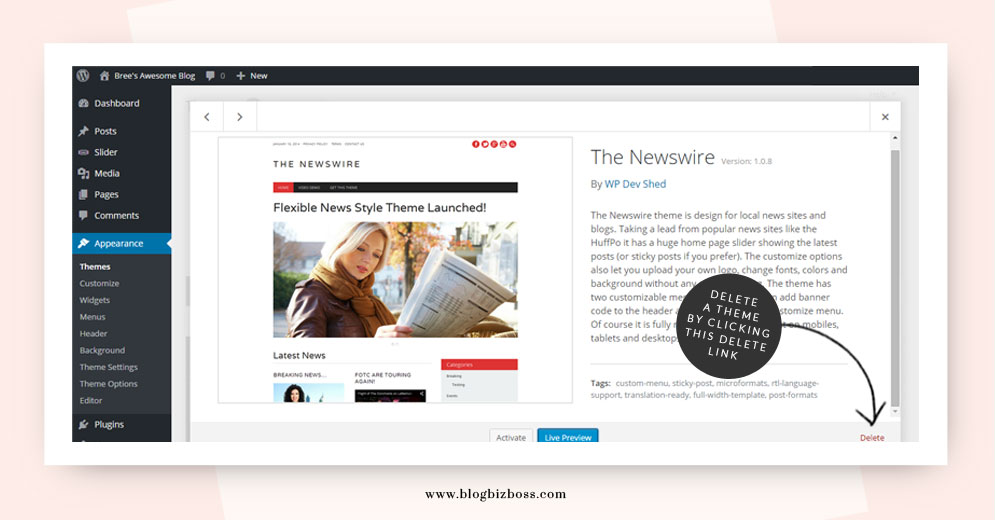
How to delete a theme
While it’s OK to have numerous themes installed, I wouldn’t make a habit of leaving them installed “just because”. The more themes you have installed, the more you have to update and the bigger your backup files will be. So if there’s a theme that you’re sure you’re not going to be using, it’s best to delete it from your site. Do this by heading to Appearance > Themes to view all of the themes you have installed. Make sure the theme you want to delete is not activated (and activate the another one if it is) and hover your mouse over the theme and click Theme Details. You’ll see a confirmation message pop up. Click OK and that’s it!
Related video
This YouTube video by user Logan Walker shows all three ways of installing a WordPress theme. The third way mentions visiting your hosting account to upload the theme folder, but you can do this via FTP as well.
Do you have any questions about installing themes? Ask below!
Next lesson: How to customise your WordPress theme

Hello Bree! Thank you for this awesome WP training! I’m really enjoying it. I actually want to create a business website, not just a blog site. I have heard a lot about the Divi theme builder and would love your feedback. I want to pick a theme that will do what I will need it do, without having to change in the next year…not sure what all that is right now :), but things like responsive, ecommerce, etc. I do understand that it is harder to transfer from Divi to a different theme, but it sounds like Divi has everything I could want or need. Any thoughts? Thanks in advance for your help!
Thanks,
Kim
Hi Kim! You’re so welcome 🙂 Divi is extremely popular, and if you’re wanting a lot of control over how your site looks, then it’s a good option as it comes with ready-made designs and also the option to create your own from scratch. The good thing is that you can try it for free! Simply download it from its developer https://blogbizboss.com/go/elegantthemes Hope that helps 🙂
I’ve been reading through pretty much all the content you’ve provided before even registering my blog name, I haven’t even created my login for WP yet.. I have to do all my research first, I am funny that way.. But my question is on the Themes page you mention that the theme’s can be uploaded for free on WP.org, does that mean that WP.com doesn’t have any free themes? I want to have a .com site if I buy the .org as it seems to have better options as far as space, available limited content for your blog ec cetra, can I still have a .com under that option?
@shantelpina Hi there! There are a limited number of free themes available for WP.com, and there are also a limited number of premium themes for WP.com. If you choose WP.org you’re not limited by anything… literally! If you’re really wanting to make many changes, incorporate advertising, an e-commerce store, pop-up newsletter subscription boxes and so on, the self-hosted (wp.org) is by far the better option. If you’re unsure, start out with a free wp.com account and have a play around to get an idea of what you’re in for.
Hello Bree! Thank you for making this fantastic resource available for free.
I’ve come to a point in my site design where I’m very stuck. I am building a site that will have a mix of static content, blog posts and a directory (ideally the directory will also be searchable). Essentially, I want my site to be a resource/information source where I promote new static content and new content in the directory via my blog. I think I’d like the blog posts to be the feature on the site, however, because I plan to publish new content about twice a week. Are there any themes that you know of that would support this type of site? Any other resources you could point me to would be most appreciated. Thanks!
@lara Hi Lara! OK, this is a great question. The good news is that all themes should be able to cater to what you’re after: static content and blog themes. The directory would be created by way a plugin. There are many directory plugins available (such as these: http://www.wpbeginner.com/plugins/best-directory-plugins-for-wordpress/). It just depends on what you’re hoping to use it for!
Thank you, Bree!
I just purchased my theme tonight and it’s a child theme from Pretty Darn Cute Designs (Pretty Chic theme). I followed your directions to install the theme but WP told me I needed to add the genesis plug in. I went to the PDCD support and they had a link to download the new genensis plug in (I’m guessing new because this is ALL new to me). I went to install that plug in and now anytime I click anything in my dashboard on the left hand column I get a blank screen that says Server Error 500. I have no idea what to do and everything I’ve read on Google doesn’t help because they say to uninstall stuff but I can’t get to anything to uninstall. HELP!
@abcsoflife In this case I suggest contacting Genesis and/or PDCD direct. As a paying customer, you’re now entitled to support from them and it’s probably the first and best place to start. If you haven’t already, try deactivating any plugins first, just to be certain it’s not a conflict with something you may have installed!
@abcsoflife1 Also, try switching back to a standard WordPress theme (such as twenty fifteen) temporarily just to make sure the problem is with the new theme you have installed.
I finally got the computer genius to look at it (my husband. You know the old saying about the plumber? Yeah…;)
It was a crazy glitch but the good news is, ITS DOWNLOADED, hallelujah!!!
Moving on to customizing!
Haha! Glad it’s sorted for you 🙂
OK I’m still alive! I purchased my theme but now it’s in one of those files that needs to be separated. The one file needs to stay zipped so I can install it. Only I can’t figure out how to separate it from the other part of it (I guess you call that unzipping?)
Anyhoo, when I go to downloads I can see the zipped file apart from the rest of it. But when I go to download it there is no way to get it in there apart from the rest of it.
Am I making any sense? LOL.
The company I bought it from (Solo Pine) does have directions and it tells me to go to upload it after I’ve seen it in documents but every time I try it takes me to another page that has the whole thing there again. I’ve tried to figure out how to get out of there and to the file.
What I am asking is – do you think I should just go ahead and put the whole thing into FTP? And then download as I’ve read from that site and here that I can do? But if I try that, won’t it still all come out together?
I’m sorry for such a lengthy question.
Hi Ruthie! Congrats on getting this far! OK, so my first suggestion is that if you’re not 100% certain if you need to unzip it, try uploading it via the dashboard anyway. If it’s not right, it’s not going to work and you will know then that you need to “unzip” the first folder to reveal the second zipped folder. To “unzip” I suggest using YouTube to find a video that shows you how (just search for unzip on Mac of PC – whichever you’re using). Let me know how that works out for you!
What a genius idea! DUH. I wish I’d thought of that sooner…
Yeah, I did try downloading it several times and it’s not happening because some of it needs extracted from the main part. But the main part needs to remain unzipped according to the directions. I can see the extra files there sitting right underneath the main one that stays zipped.
So I’m thinking now (after having watched YouTube) that I could probably just take those extra files that I see and put them in a folder. Then delete the ones still hanging out there, which will leave the single zipped file. And then, I can attempt the download again.
Does that sound like a good idea to you? (I’m working with Windows 8.)
Hi Ruthie, hmmm, it’s a little hard to say for sure when I can’t see the folder myself 🙂 If you’d like, e-mail the downloaded theme (the original zipped file) to me and I’ll take a quick look for you 🙂