


 Express version: The easiest way to tailor your WordPress theme is using the WordPress Customize settings within the Appearance section of the dashboard. You may find it may make arranging widgets and menus a little easier than the actual menu and widgets pages (which will be covered soon). In the next lesson I expand on how to edit your theme’s CSS.
The lesson: With your WordPress theme chosen it’s time to give it a unique look. Here we’ll cover how to add your own logo, change colours, fonts, menus and widgets. There are multiple ways (again!) you can do this. We’ll start with the easiest one!
Customizing WordPress: Option 1
The first – and easiest – way takes place in the Appearance > Customize section of the dashboard (as pictured below).
What bloggers and website owners are usually looking for first and foremost are ways to make changes to the colours of their theme, however this Customize area covers some things we have already covered in this course (such as choosing a static front page which we mentioned back in the lessons about WordPress settings) and some things we haven’t (such as widgets and navigation/menus). You might like to read through a few more lessons on these “haven’ts” and come back to this when you’re more familiar on how they work.
It’s easiest to think of the Customize option as the area of the back end of WordPress that brings in pretty much everything to do with how you want your readers to view your site in terms of appearance. The options you have to play with here will depend on the theme installed. For this demonstration, I’ll be using the same free theme I used in the previous lesson: The Newswire theme.
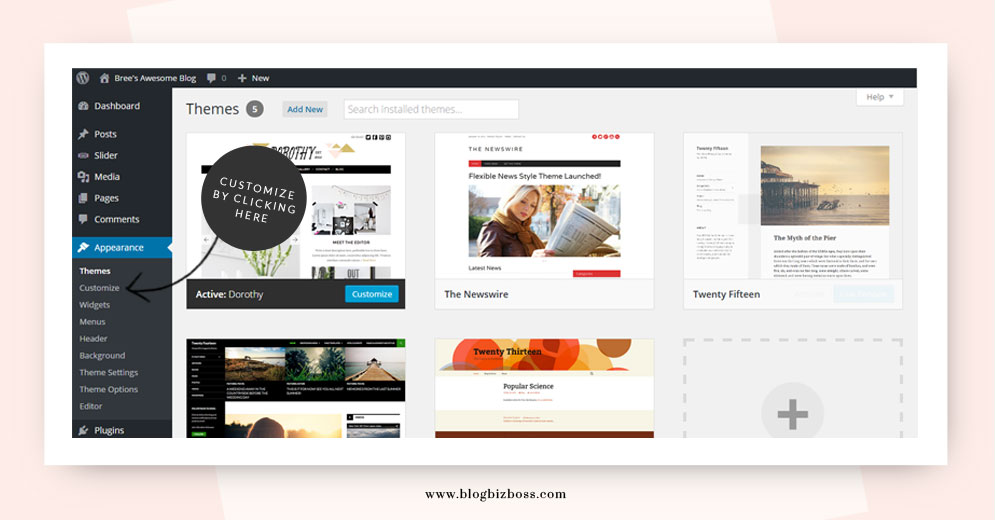
When you click the Customize option, you’ll be taken to a new screen that has two parts, as shown below. To the right you see the theme you have installed that you want to work on, and to the left you have a menu showing what customization options you have for the theme.
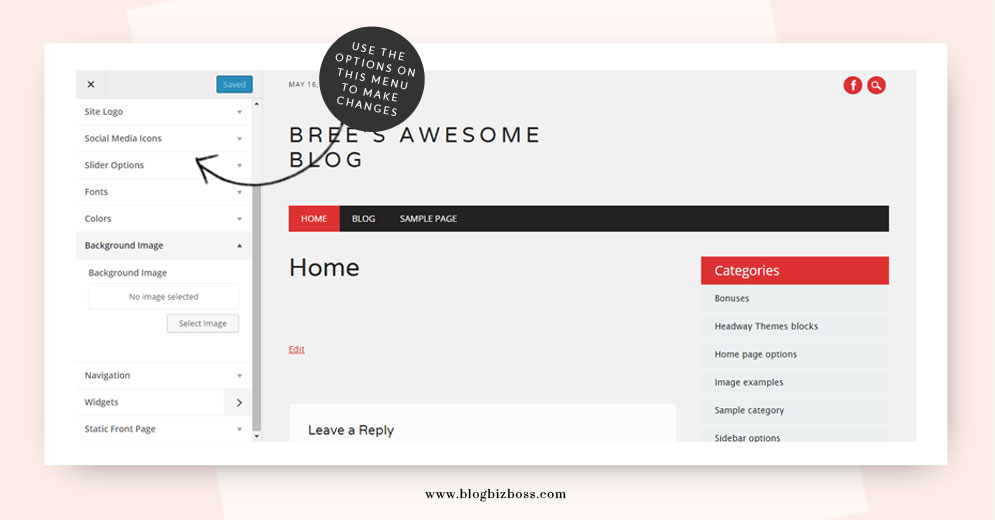
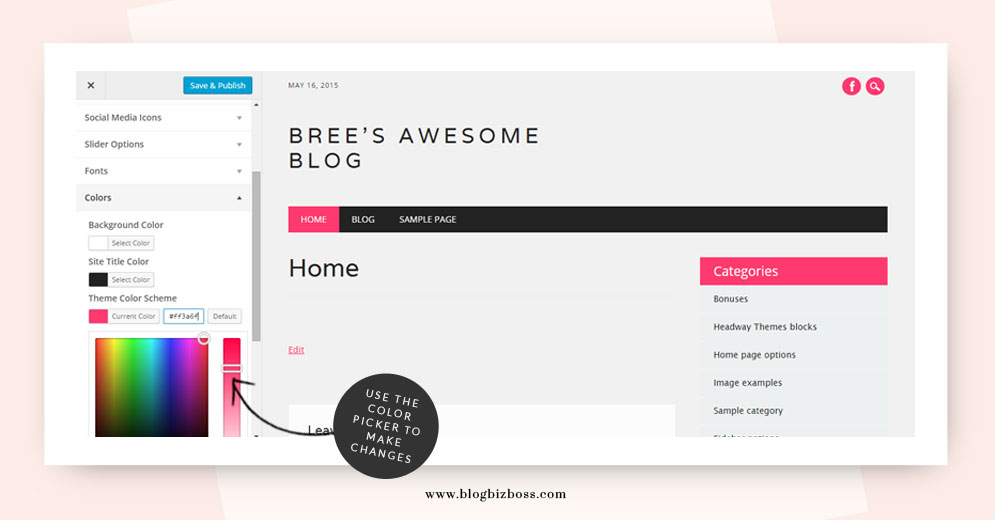
As you click through the menu options to the left, you’ll see that WordPress makes it easy to make simple changes to your theme. Making most of these changes are simply are a matter of selecting an option from a drop-down menu, such as in the case of changing the theme’s colour scheme (as pictured below). (Not pictured in the image above is the addition of the Additional CSS area which I cover in the next lesson.)
Tip: If you’re not great at creating your own colour scheme, I suggest using COLOURlovers for trends and palettes. They make it really easy to select colours that work together!
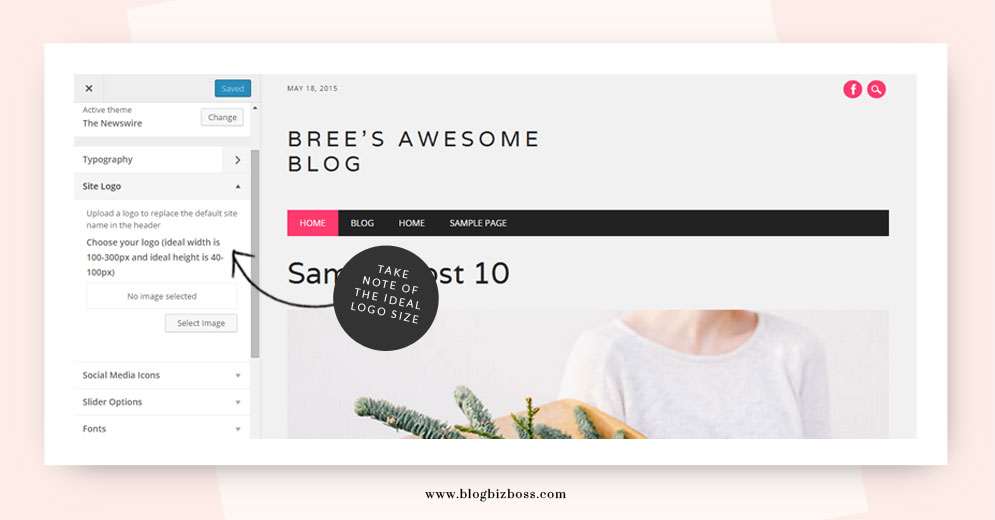
To insert a graphic (such as a logo) that you’ve designed (or had designed – find designers at Fiverr or pre-made logos here) as your header, you’d use the Site Logo option. When you click it, you’ll see that there are guidelines for the perfect-sized image to upload. The best way to resize an image is with image-editing software such as PicMonkey or Canva.
Work your way through each customization option available to see if there are things you’d like to change. If there’s something you want to change but don’t see it as an option, you may need to use options 2, 3 or 4 – which I’m about to cover, or move onto the next lesson on CSS.
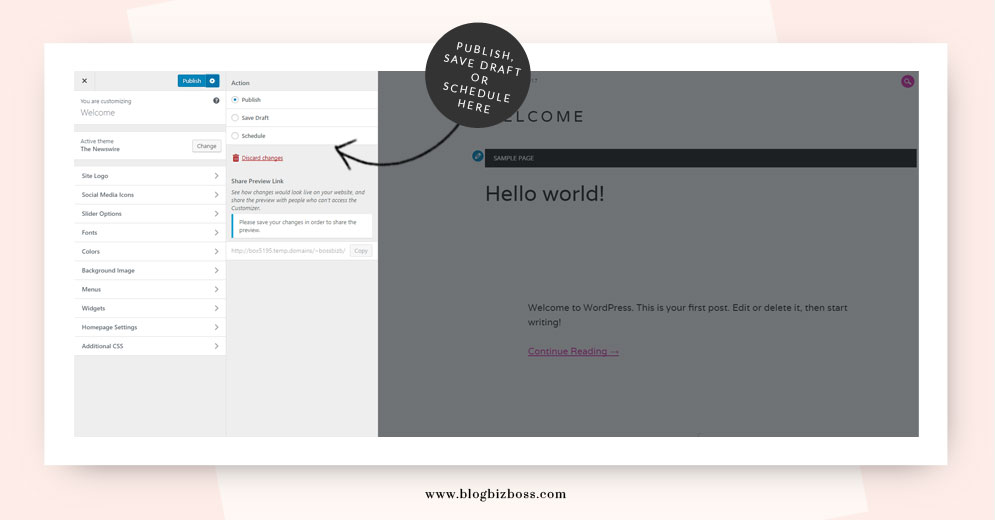
Publish, Save Draft or Schedule changes
Also new to the customize section is the ability to save your changes as a draft, schedule them, or share a preview with your friends. You’ll see in the updated picture below, that where the Save button once was (as pictured in images above) there is now a Publish button. Once clicked, options to publish your changes, save them as a draft or schedule them for publishing fly out. You can even copy a URL to give to someone else to take a look if needed!
Customizing WordPress: Option 2
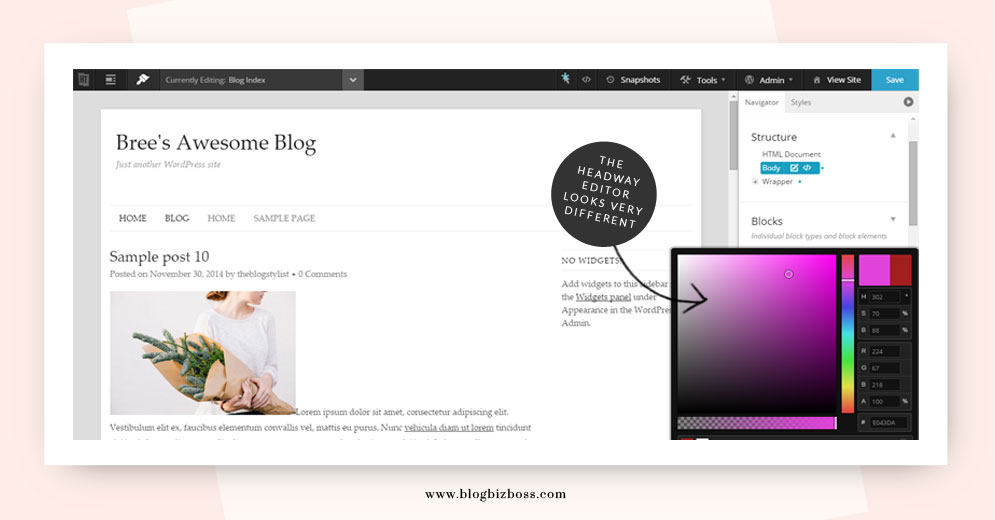
Because each theme creator does things differently, there could be another in-built way of changing colours and fonts for your particular theme. Where and how you do this may require you to read through the instructions for your theme. For example, Headway Themes* has its own built-in visual editor. It would be impossible for me to cover every customization option every theme offers, so I recommend you spend at least 20 minutes just clicking through your dashboard and becoming familiar with what the theme is offering! (*Since writing this lesson, I no longer use or recommend Headway Themes.)
Customizing WordPress: Option 3
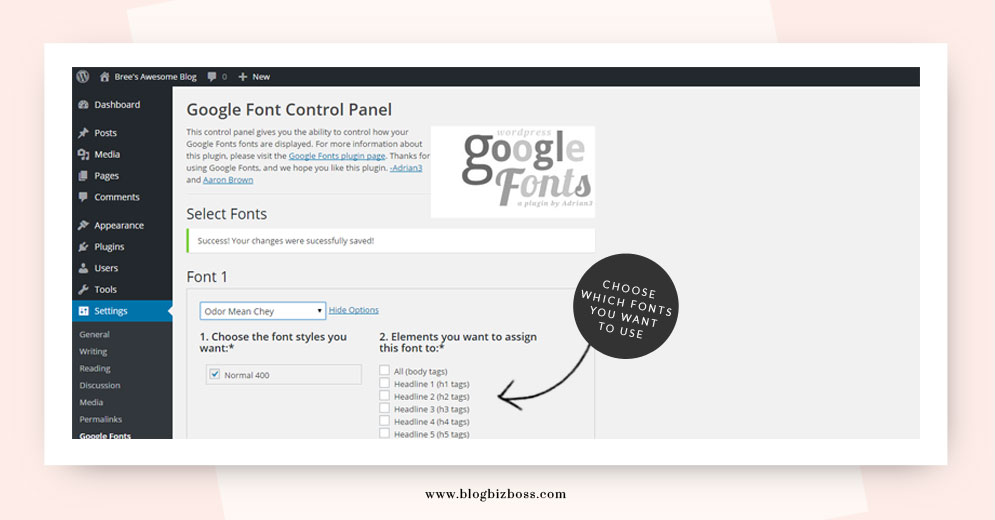
This will make a lot more sense when we get to the section on plugins (so feel free to come back to this once you’ve read it!) but plugins are also handy for making changes to your theme’s appearance. For example, the WP Google Fonts plugin increases your number of font choices from a couple, to the entire Google Fonts library! (And PS: To help with selecting which fonts work together, check out the Font Pair website).
There are many, many, many plugins available for customizing your site, from those that help with CSS (which stands for Cascading Style Sheet, and dictates how your fonts, colours, borders etc look) such as CSS Hero, to those that manage background images (such as Background Manager which will rotate the image used as your site’s background).
Customizing WordPress: Option 4
The fourth way of customizing your WordPress site’s appearance is using the Editor (find it under Appearance > Editor). It’s by far the most complicated way – so if you’re a total novice at all of this, I do not recommend attempting this by yourself right now. However, when we get to that section, I will cover some basics for you – as well as some alternative ways of making changes – it’s always good to have an awareness of all sections of WordPress!
Related video
This YouTube video by user Catalyst Design shows you an overview of the theme customizer (as it was prior to the introduction of the Additional CSS area and the ability to save changes as a draft or schedule them).
Do you have any questions about this lesson on WordPress themes and their installation? Ask below!
Next lesson: How to edit your theme’s CSS