

 Express version: CCS – which stands for Cascading Style Sheet – isn’t exclusive to WordPress, however, if you’re googling WordPress customisation tutorials you’ll hear it mentioned often. Also, since recent updates to the WordPress Customizer now include a dedicated CSS area, I thought I’d at least show you some basics. But this lesson is not really for beginners, and it’s definitely not necessary for WordPress to work, so you can move onto the next lesson (how to use WordPress widgets) at any time.
The lesson: The .css document is the file that dictates the colours, fonts (and more) that your theme uses for things to look the way they do. You can find it in the Appearance > Editor section of WordPress, however as mentioned in a previous lesson, it’s best not to touch that and make any changes to the CSS area within the Appearance > Customize section of the dashboard instead. Also, the Customize section allows for many changes to your theme’s appearance without needing to know any code, but if there’s something specific the Customizer won’t allow for, then some editing of the CSS could be required.
How to do basic CSS
There’s too much to cover in a single post – it’s a course in itself! – so I’m just going to show you a few simple things. If you want to know more, I recommend the W3Schools website for loads of information on CSS, HTML and more. If you want to do a CSS course, the one by Treehouse is pretty good.
Start here by going to Appearance > Customize > Additional CSS within the WordPress dashboard.

As an example, I’ll focus on the blog post title and how you can edit it using the example below.
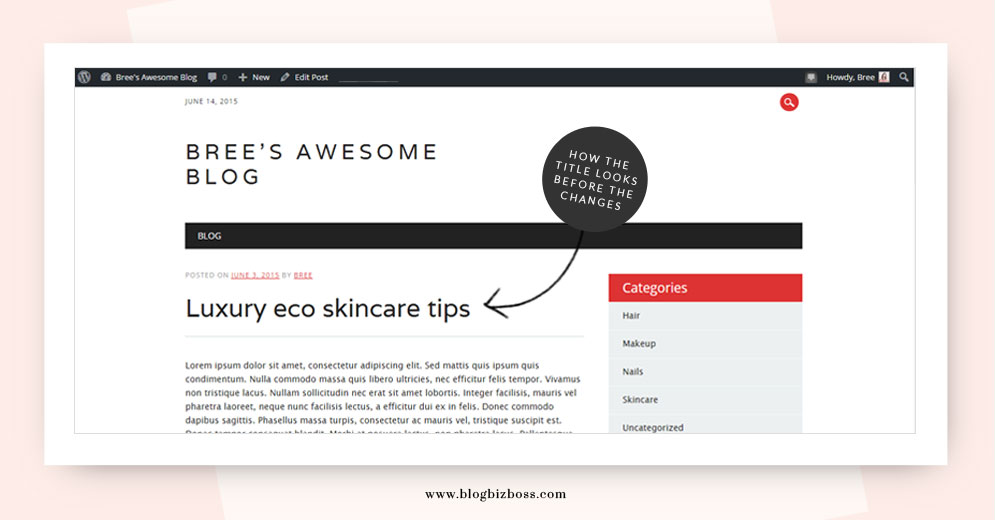
First, you need to use Google Chrome. It’s free, so install it if you don’t already have it on your desktop! Next, you find what it is you want to edit by right-clicking on it in your browser, and selecting Inspect Element. In this example, it’s the post (entry) title. You want to look for the highlighted text and its class name.

In this example, the class name (in quote marks) is entry-title. Now, go to your CSS editor and put the following on the next available line:
.entry-title {

}
You’ll notice that there’s a full stop in front of it, along with some squiggly brackets. They’re meant to be there, so don’t delete them! Now, we have to decide what we’re going to do with this CSS! Like I said, you could do a lot, but here are some options:
Change its size to 16px by adding in font-size: 16px; which would make it look like this (ignore the !important bit for now):
.entry-title {
font-size:16px!important;
}
You could make it all capitals by adding in text-transform:uppercase; which would make it look like this:
.entry-title {
text-transform:uppercase;
}
Or you could add two forward slashes before it like this:
.entry-title:before {
content:'// ';
}
Or to do all three, you’d add in the below:
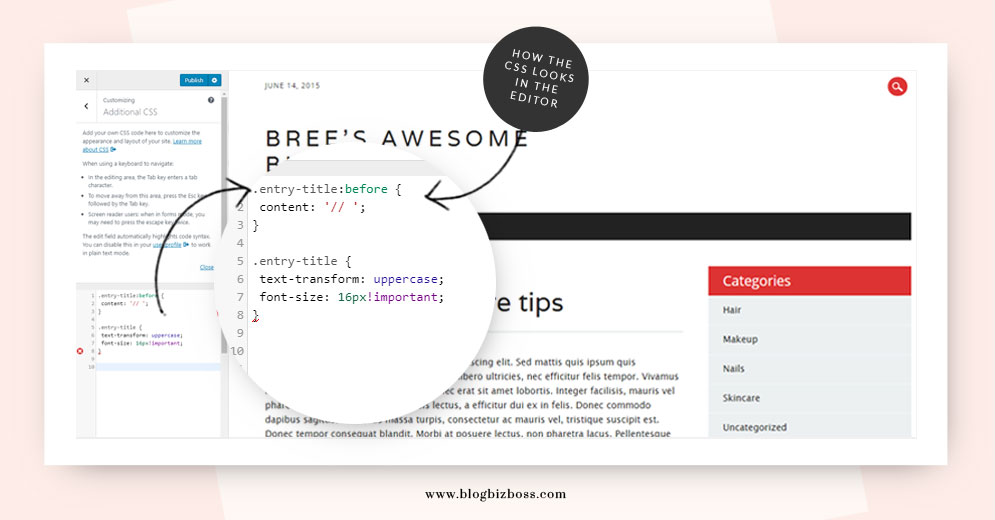
.entry-title:before {
 content: '// ';
}

.entry-title {
 text-transform: uppercase;
 font-size: 16px!important;
}
The !important part is required for the font size because the size of the font has already been decided in your theme’s style sheet. But because the content appearing before the title, and the text transformation hasn’t been decided (by default text is in title case, and there is no “before” content), it doesn’t need to be included. Here’s how it all looks in the CSS editor:
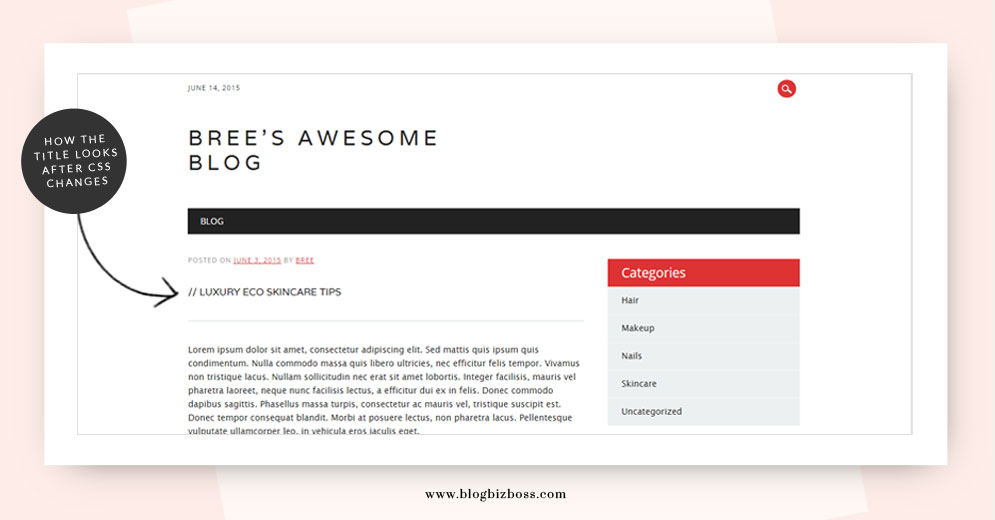
And here’s how the front end looks once saved:
Related video
In this YouTube video by WPcrafter.com, you’ll see a working example of where and how to edit some CSS in the Appearance > Customize section of your site.
Have a question? I love CSS, so if you have a question, please feel free to ask below!
Next lesson: How to use WordPress widgets